
Dodge, Chrysler - 2.7L DOHC V6
This is a difficult installation and should be done only by a qualified technician with access to professional installation tools and manuals. Failure to follow all proper installation instructions could result in a catastrophic failure and a voided warranty.
Critical Installation Tips:
- Crank Sprocket Proper Installation
- Crank Sprocket Alignment
- Proper Tens. Bore Inspection (Does not apply to 9-5453 98’-99’ tensioner)
- Tensioner Extrusion
- Proper Oil System Prime Procedure
STEP 1: Use proper Chrysler tools for removal/installation. Do not use a hammer to beat the crank sprocket into position!
STEP 2: This engine is different from most engines in that the crank sprocket is held into place by interference fit and is indexed by a crankshaft dowel only. This crank sprocket is not clamped by the balancer bolt. As a result, there is a range in which the crank sprocket can be installed. This condition requires that the crank sprocket be installed to a dimension. This is critical for proper chain alignment. Measure from the front of the crank sprocket to the front of the crank nose with the depth rod of a set of calipers to: 1.540” +/- 0.005”.
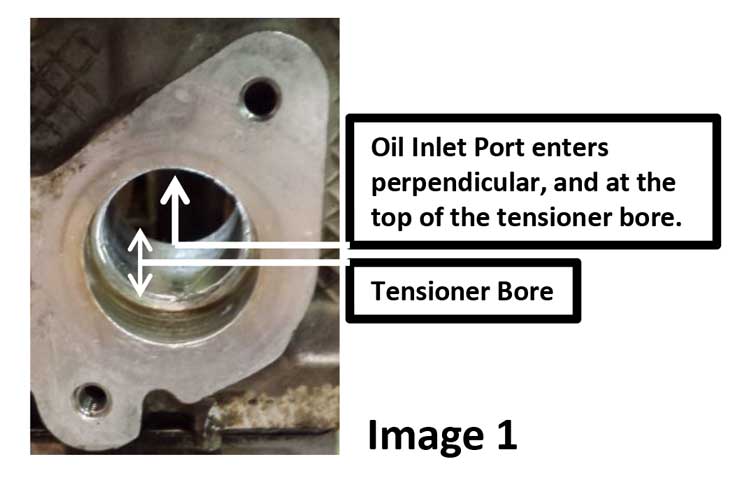
STEP 3: Inspect the tensioner bore feature in the head for any burrs or wear grooves that may damage the tensioner O-ring during installation. Also inspect the oil inlet port at the top of the bore for a sharp edge (Image 1). During any material removal insure that all debris falls out of engine and to clean the bore before installing the tensioner.
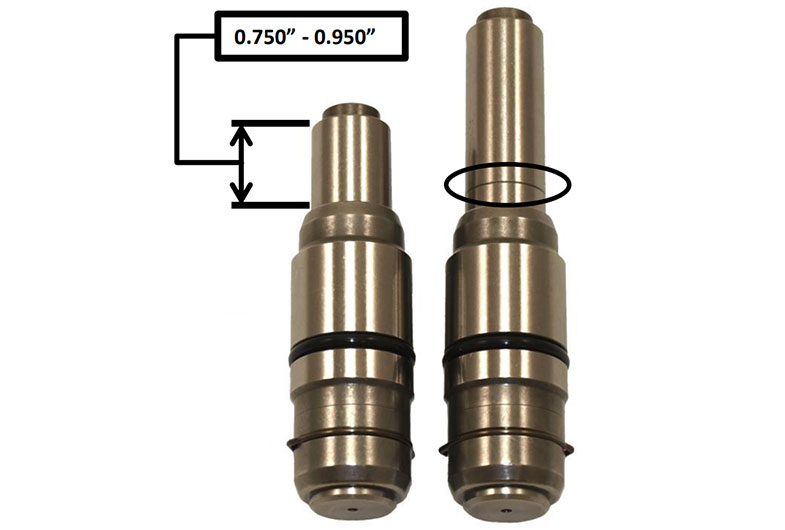
STEP 4: (Image 2) shows the primary tensioner as shipped, in deactivated position. This is also how it is to be installed.
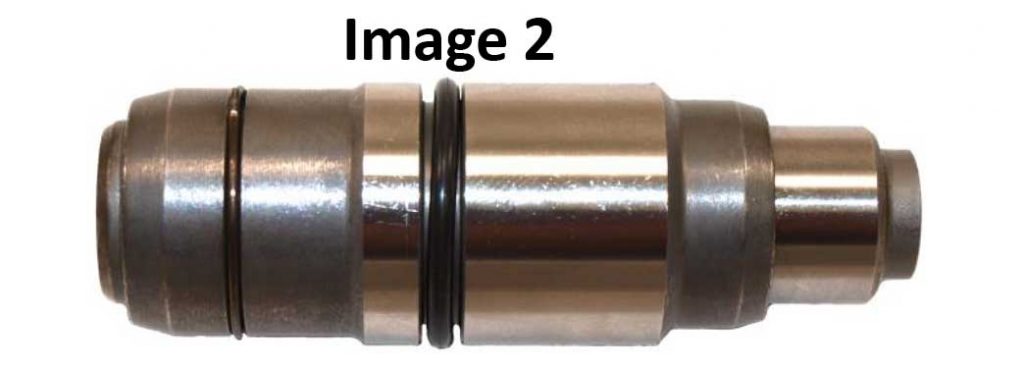
Image 2 shows the 01’-07’ tensioner, 9-5422. The 9-5453 98’-99’ tensioner looks different but functions the same.)
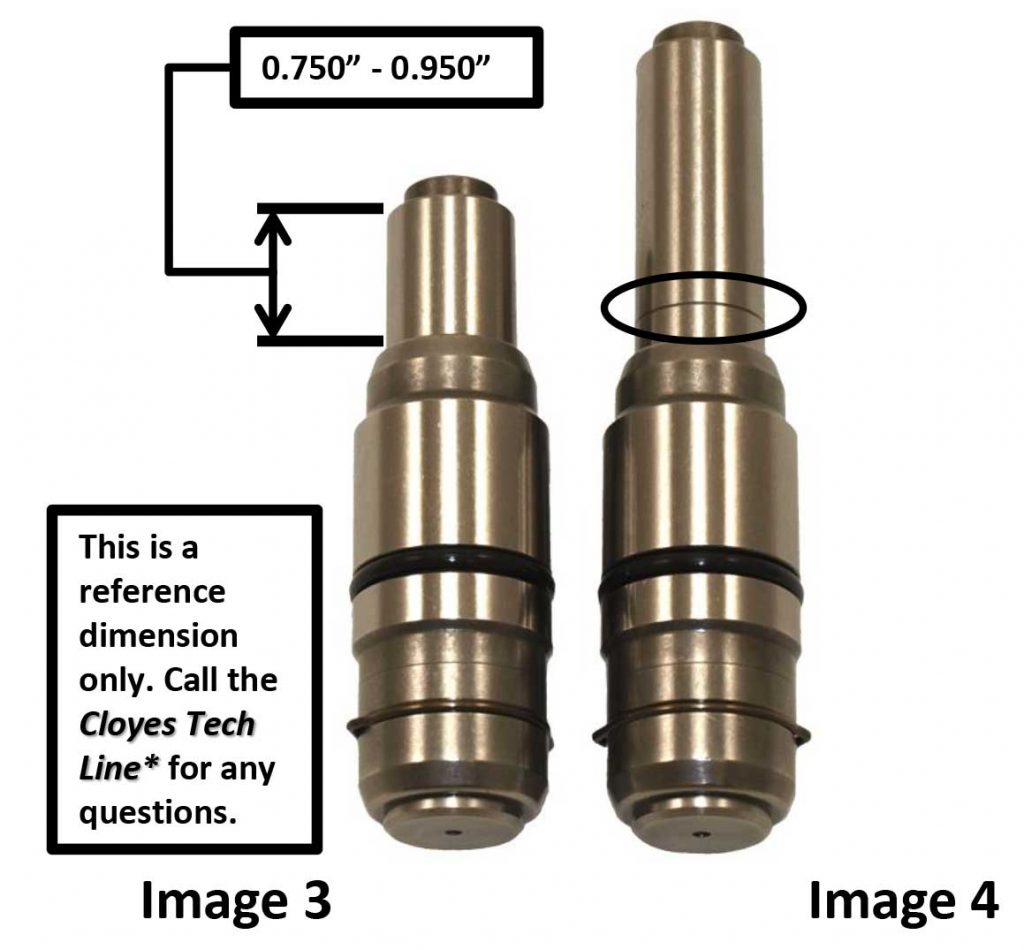
Once the entire timing system is installed and the tensioner has been activated, tensioner extrusion should be between 0.750”-0.950” as represented in (Image 3). Note: (Image 4) shows the worn timing set indicator groove to assess the current timing set before replacement.
STEP 5: Prime the entire oiling system before start-up. Do this by pulling the ignition control wires and turning the engine over for 45 seconds to 1 minute with the starter.
*Cloyes Tech Line: (479) 646-1662 X 228
Ready to replace it?
Find the timing kit that matches the vehicle, or walk through the install procedure with our engineers in the Tech Center.